Quick Start Guide
This guide will help you to set up thing’s development environment, then build and run a thing application.
Configuring the KNoT Gateway
Flashing the KNoT Gateway
Execute the following steps if you have a Raspberry Pi that is not flashed with a KNoT Gateway image.
You will need an SD Card reader to install the image.
Download the gateway image (
.imgfile) for your gateway from the releases webpage.Download and install balenaEtcher.
Connect an SD card to your computer.
Open balenaEtcher and select the downloaded
.imgfile.Select the target SD card.
Flash it.
Connect the SD card to your gateway.
You now have a flashed KNoT Gateway! Let’s configure it!
Note
Experienced users may follow Raspberry Pi’s official installing tutorial for more flashing options.
Adding Gateway to KNoT Cloud
Connect the KNoT Gateway to the same network as your computer (by using an ethernet cable).
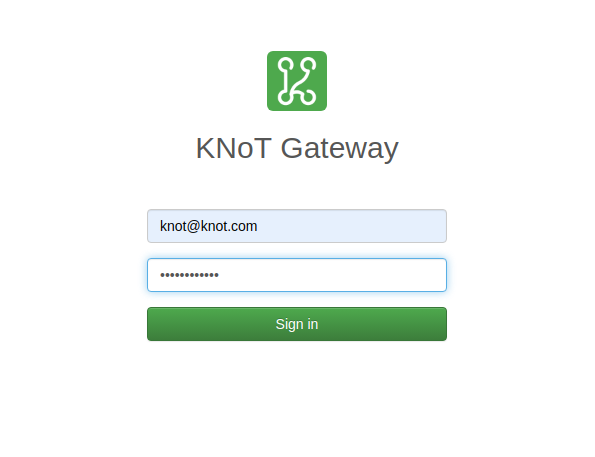
Access the gateway with http://knot.local and start the setup wizard.
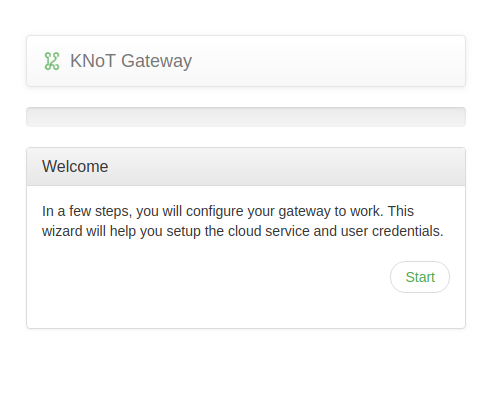
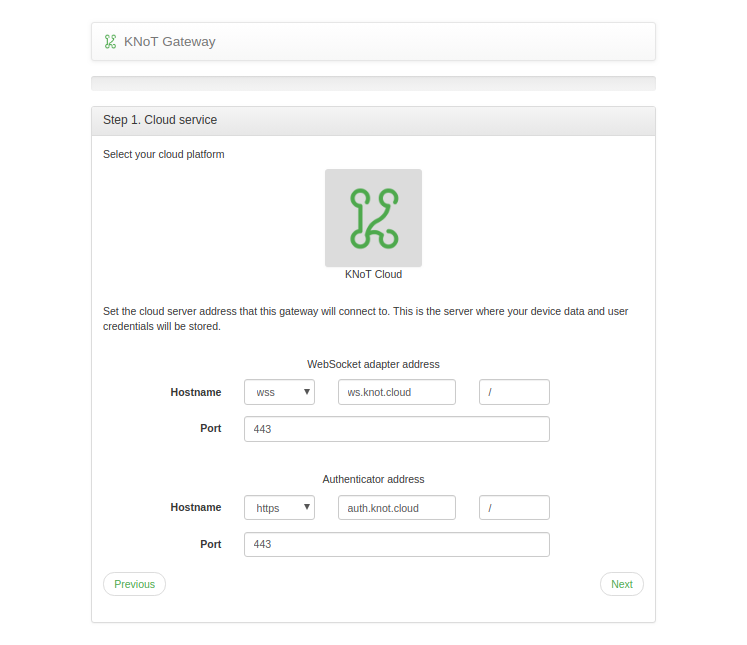
Use the default cloud settings and proceed.
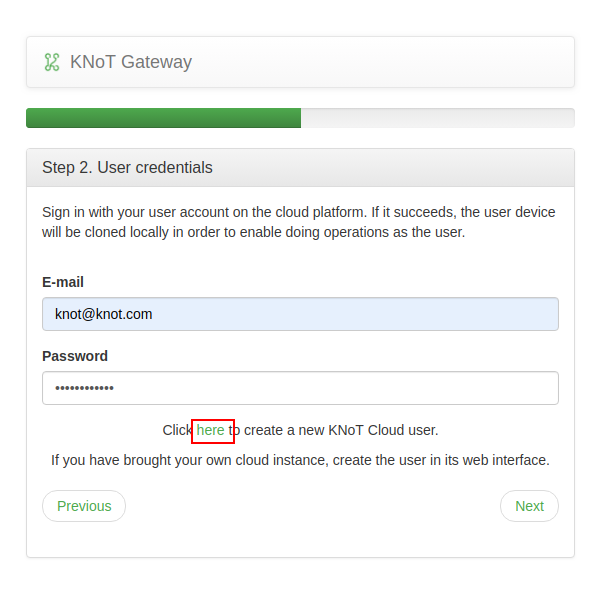
Create your KNoT Cloud user and sign in to it.
Create a new gateway at the cloud and name it.
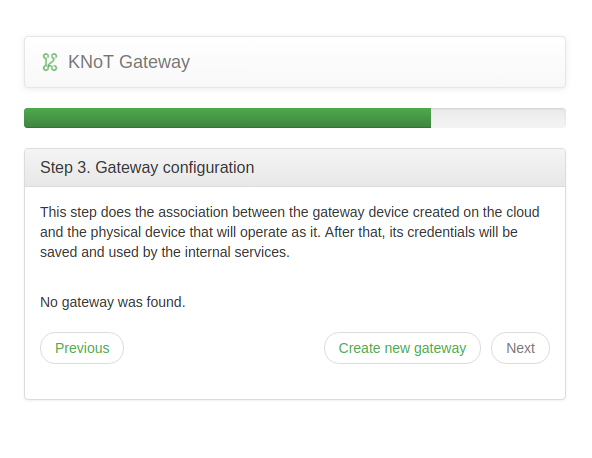
Wait for the gateway to reboot.
Log in with the email and password you just signed up at KNoT Cloud.
Note
As there are no KNoT Things connected to your gateway, the message “No nearby devices found.” will be displayed
Thing’s Development Environment
In order to compile and flash applications for the KNoT Thing, it’s necessary to set up the development environment.
The fastest way to do it is by using a pre-built Docker image.
Download and install Docker.
In a terminal, get the latest KNoT Thing SDK Docker environment image.
docker pull cesarbr/knot-zephyr-sdk:latest
Note
Docker is only available for Linux based systems, macOS 10.11+ and Windows 10 Pro/Enterprise.
Programming the KNoT Thing
Compiling project
Clone the zephyr-knot-sdk repository to your home folder.
git clone https://github.com/CESARBR/zephyr-knot-sdk.git ~/zephyr-knot-sdk
Navigate to the application project directory.
cd ~/zephyr-knot-sdk/apps/blinkRun environment image.
docker run -ti -v $(pwd)/:/workdir cesarbr/knot-zephyr-sdk:latest
From the container, build the project for the target board.
If using the KNoT DK:
[user@container] $ knot make --board dk
If using the KNoT Dongle:
[user@container] $ knot make --board dongle
Flashing board
From your project folder, export the generated files to a
outputfolder.[user@container] $ knot export output/
Install nRF Connect.
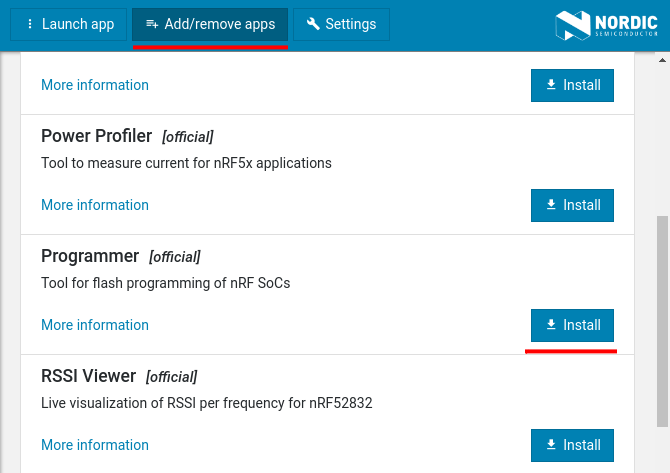
Open nRF Connect and add the Programmer App.
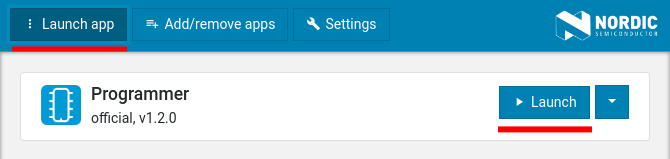
Launch the Programmer App.
Connect the device to a USB port.
Tip
If using the KNoT Dongle, press the RESET button to get into DFU mode. The red LED will start to blink.
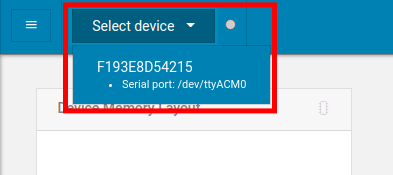
Select the target device.
Define the HEX file to be flashed.
Click Add HEX file and select the
boot_sgn_apps.hexfile that was exported to theoutput/folder.
Note
The path for the hex file should be
~/zephyr-knot-sdk/apps/blink/output/boot_sgn_apps.hex.Flash the project.
Click Write and wait for the board to be flashed. The red LED will stop blinking for the Dongle.
Configuring the Thing network
In this section we are going to configure the Thing to automatically connect to the Gateway mesh network.
Make sure that the device Thing is on the Setup Mode, indicated by the alternating LEDs.
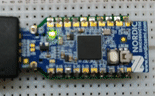
KNoT Dongle: Setup mode
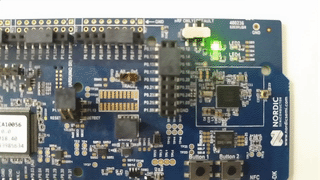
KNoT DK: Setup mode
Download the mobile KNoT Setup App and install it to your smartphone (Android only).
Connect your smartphone to the same Wi-Fi network that you connected your Gateway to.
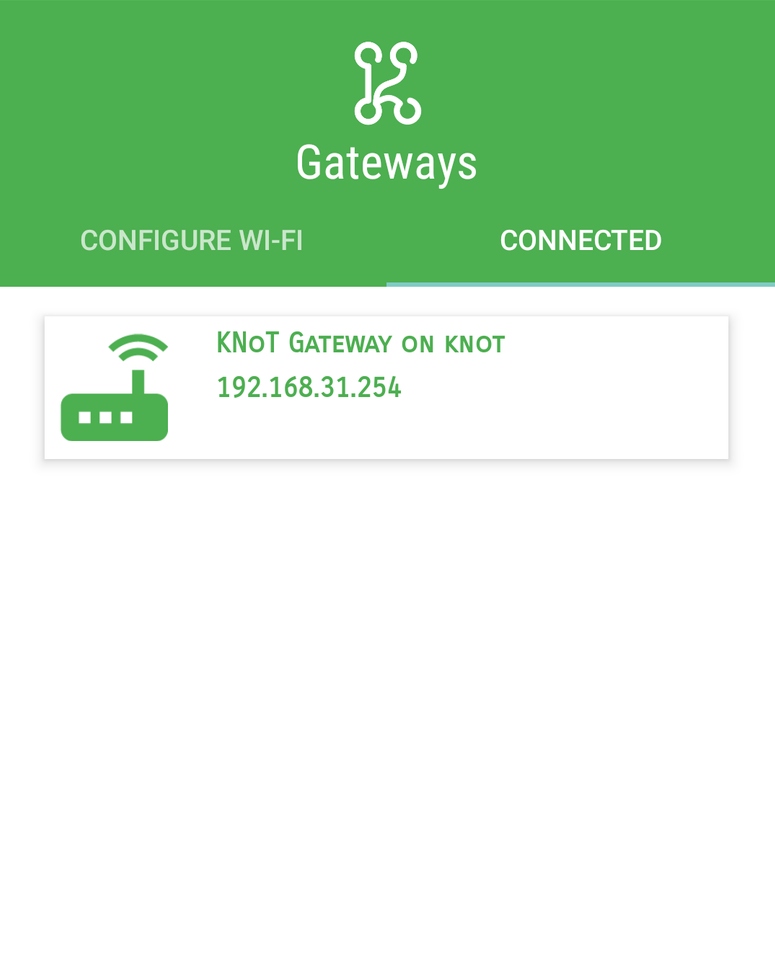
Open the KNoT Setup App, and select your gateway under the Connected tab
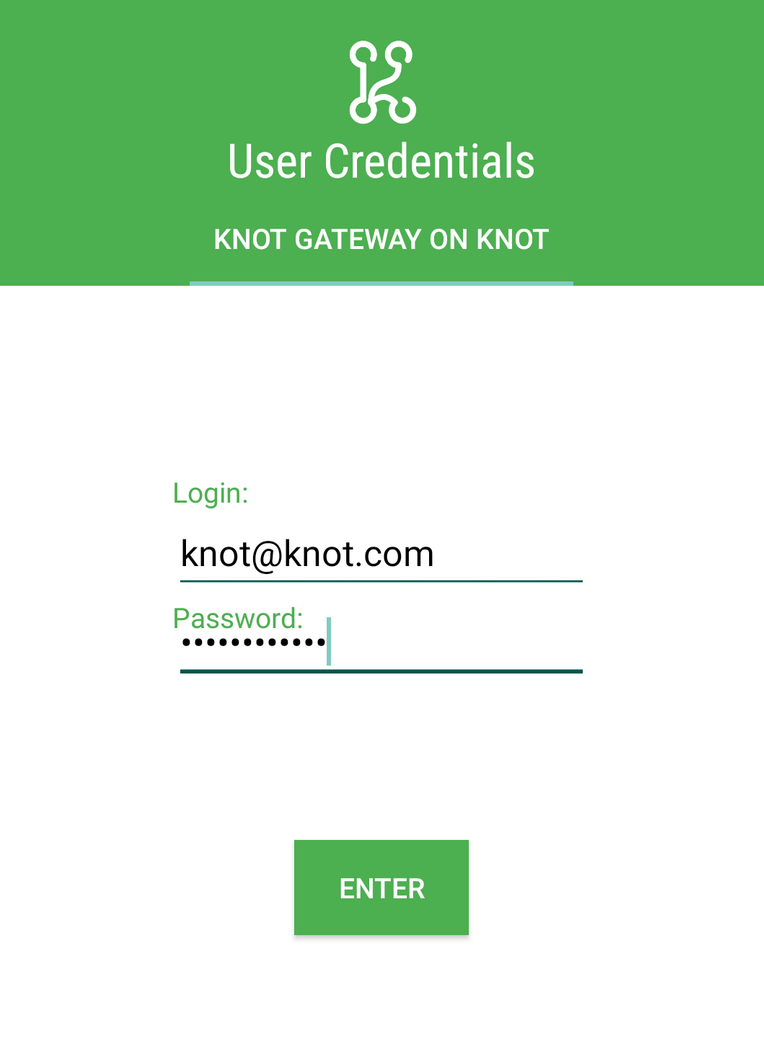
Login with your user credentials
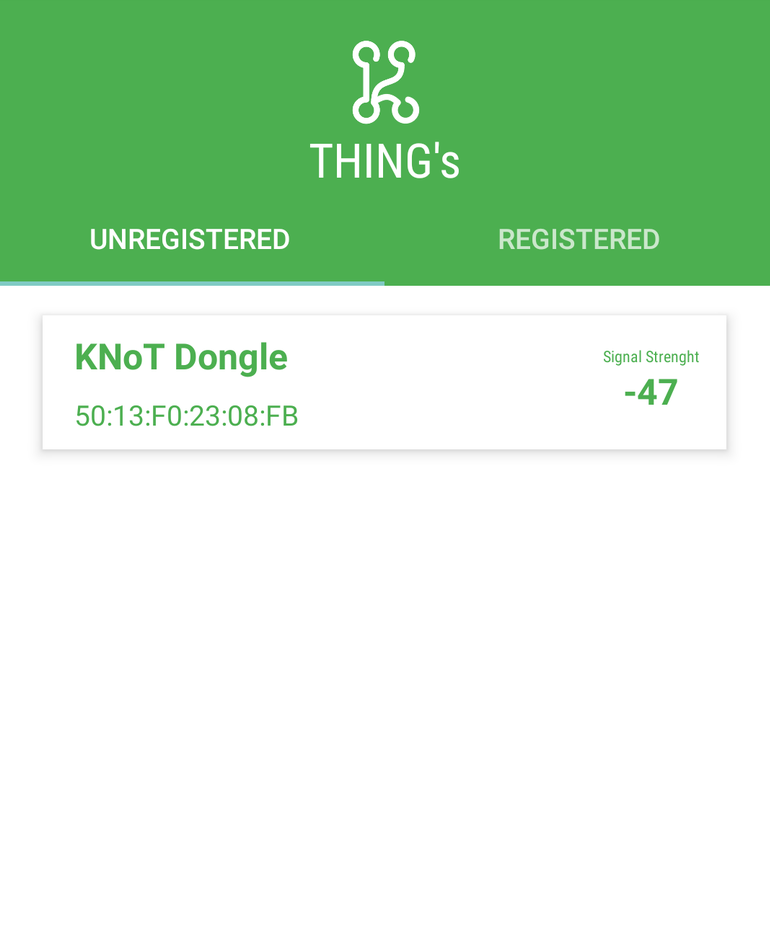
Select the target Thing under the Unregistered tab
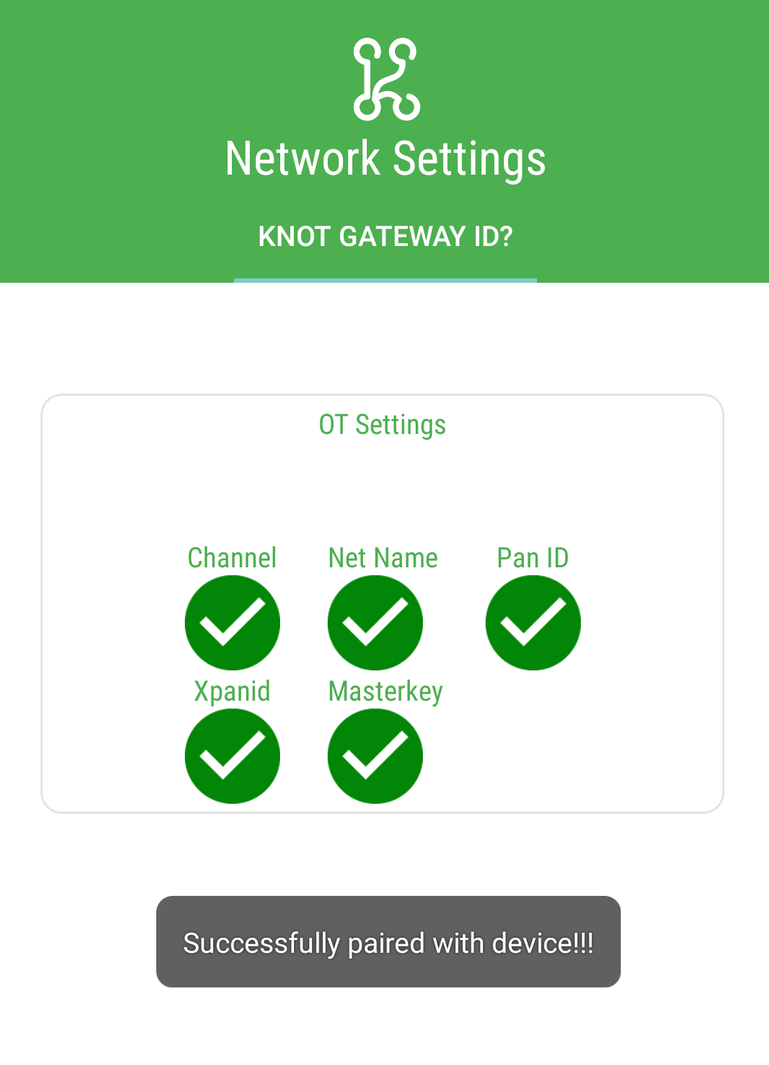
Wait for the OpenThread configurations to be transferred.
Power off and on the KNoT Thing.
See connected Things
If all the steps were followed correctly, it will be possible to see that the KNoT Thing is connected to the target Gateway.
To do so:
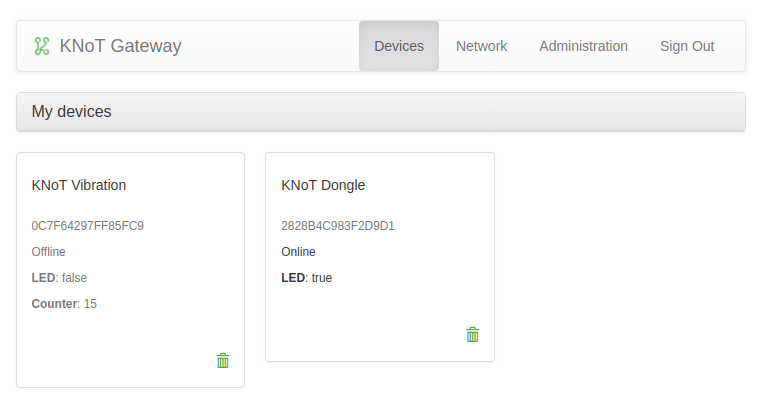
Access the gateway web page with http://knot.local.
Login with your user credentials.
Look for your connected thing and see the value being updated.
Representing an Application on KNoT Cloud
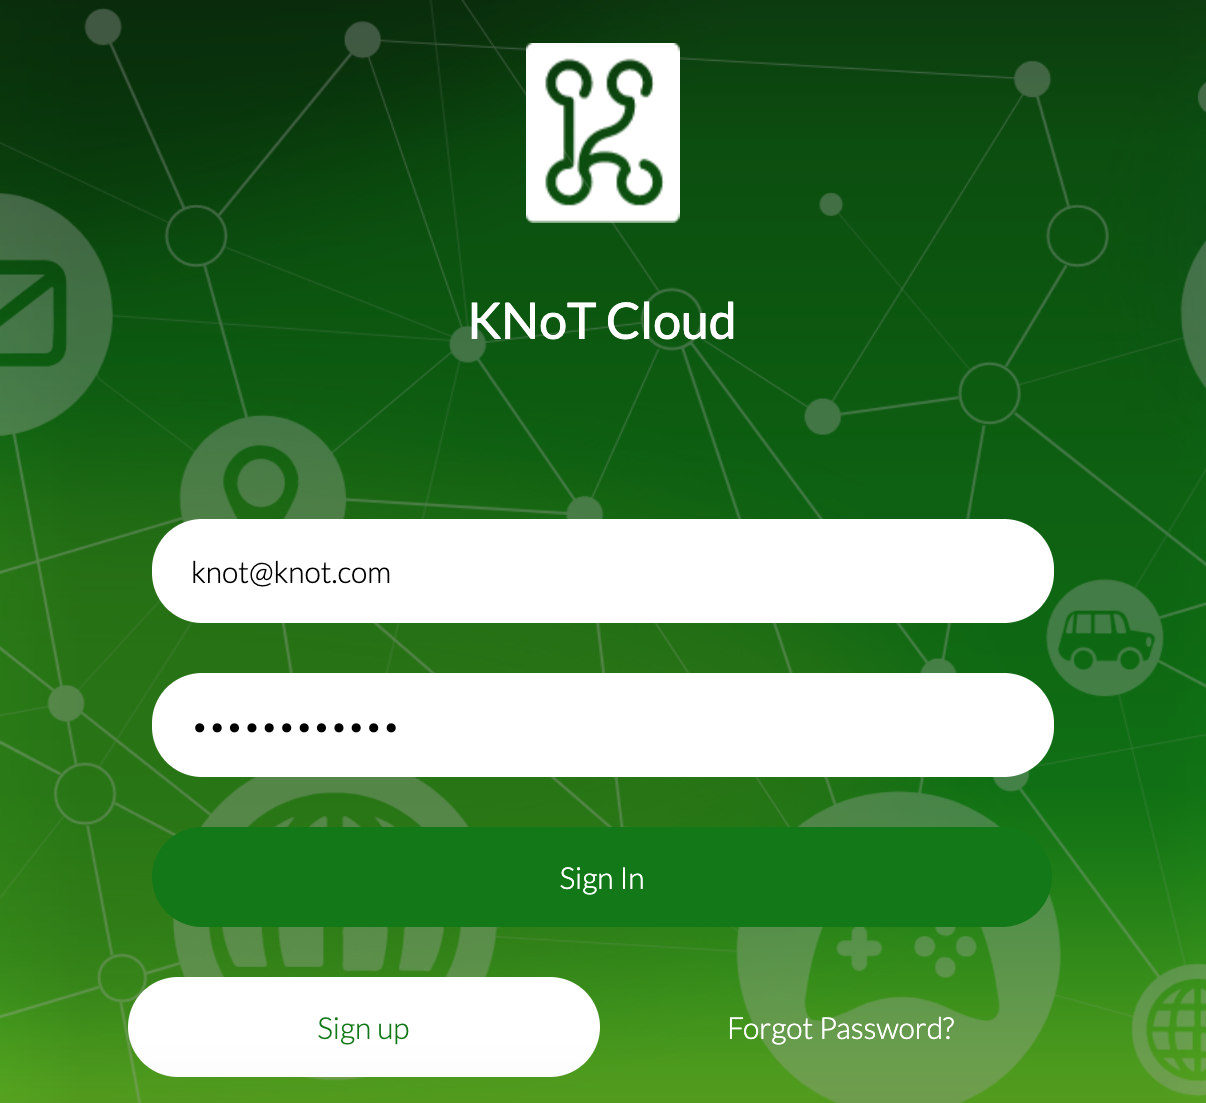
Log-in to KNoT Cloud.
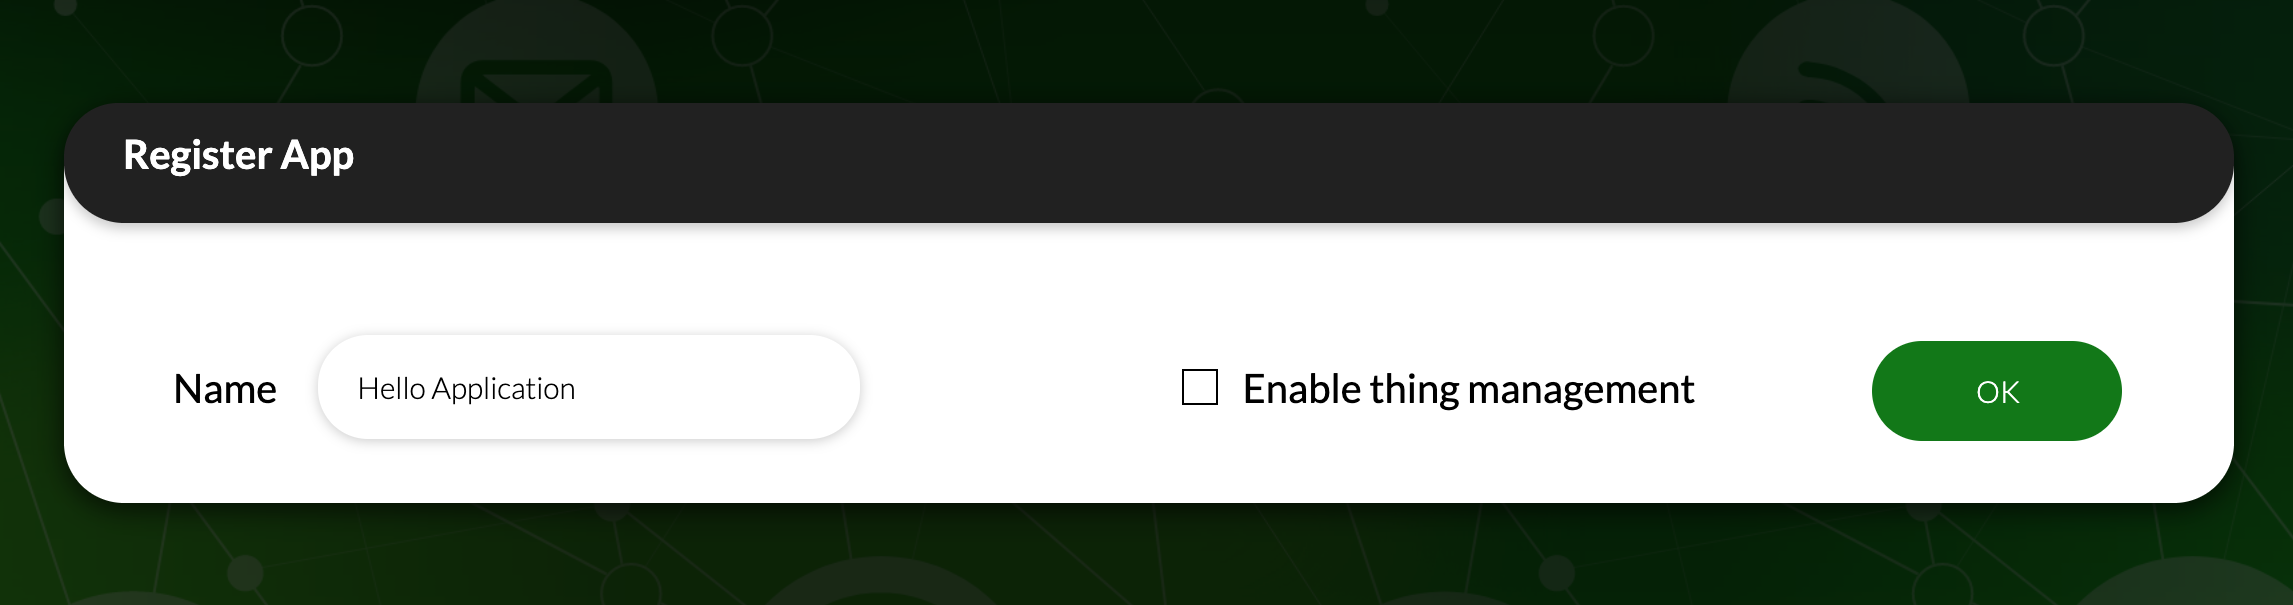
Go to Apps page and create an application.
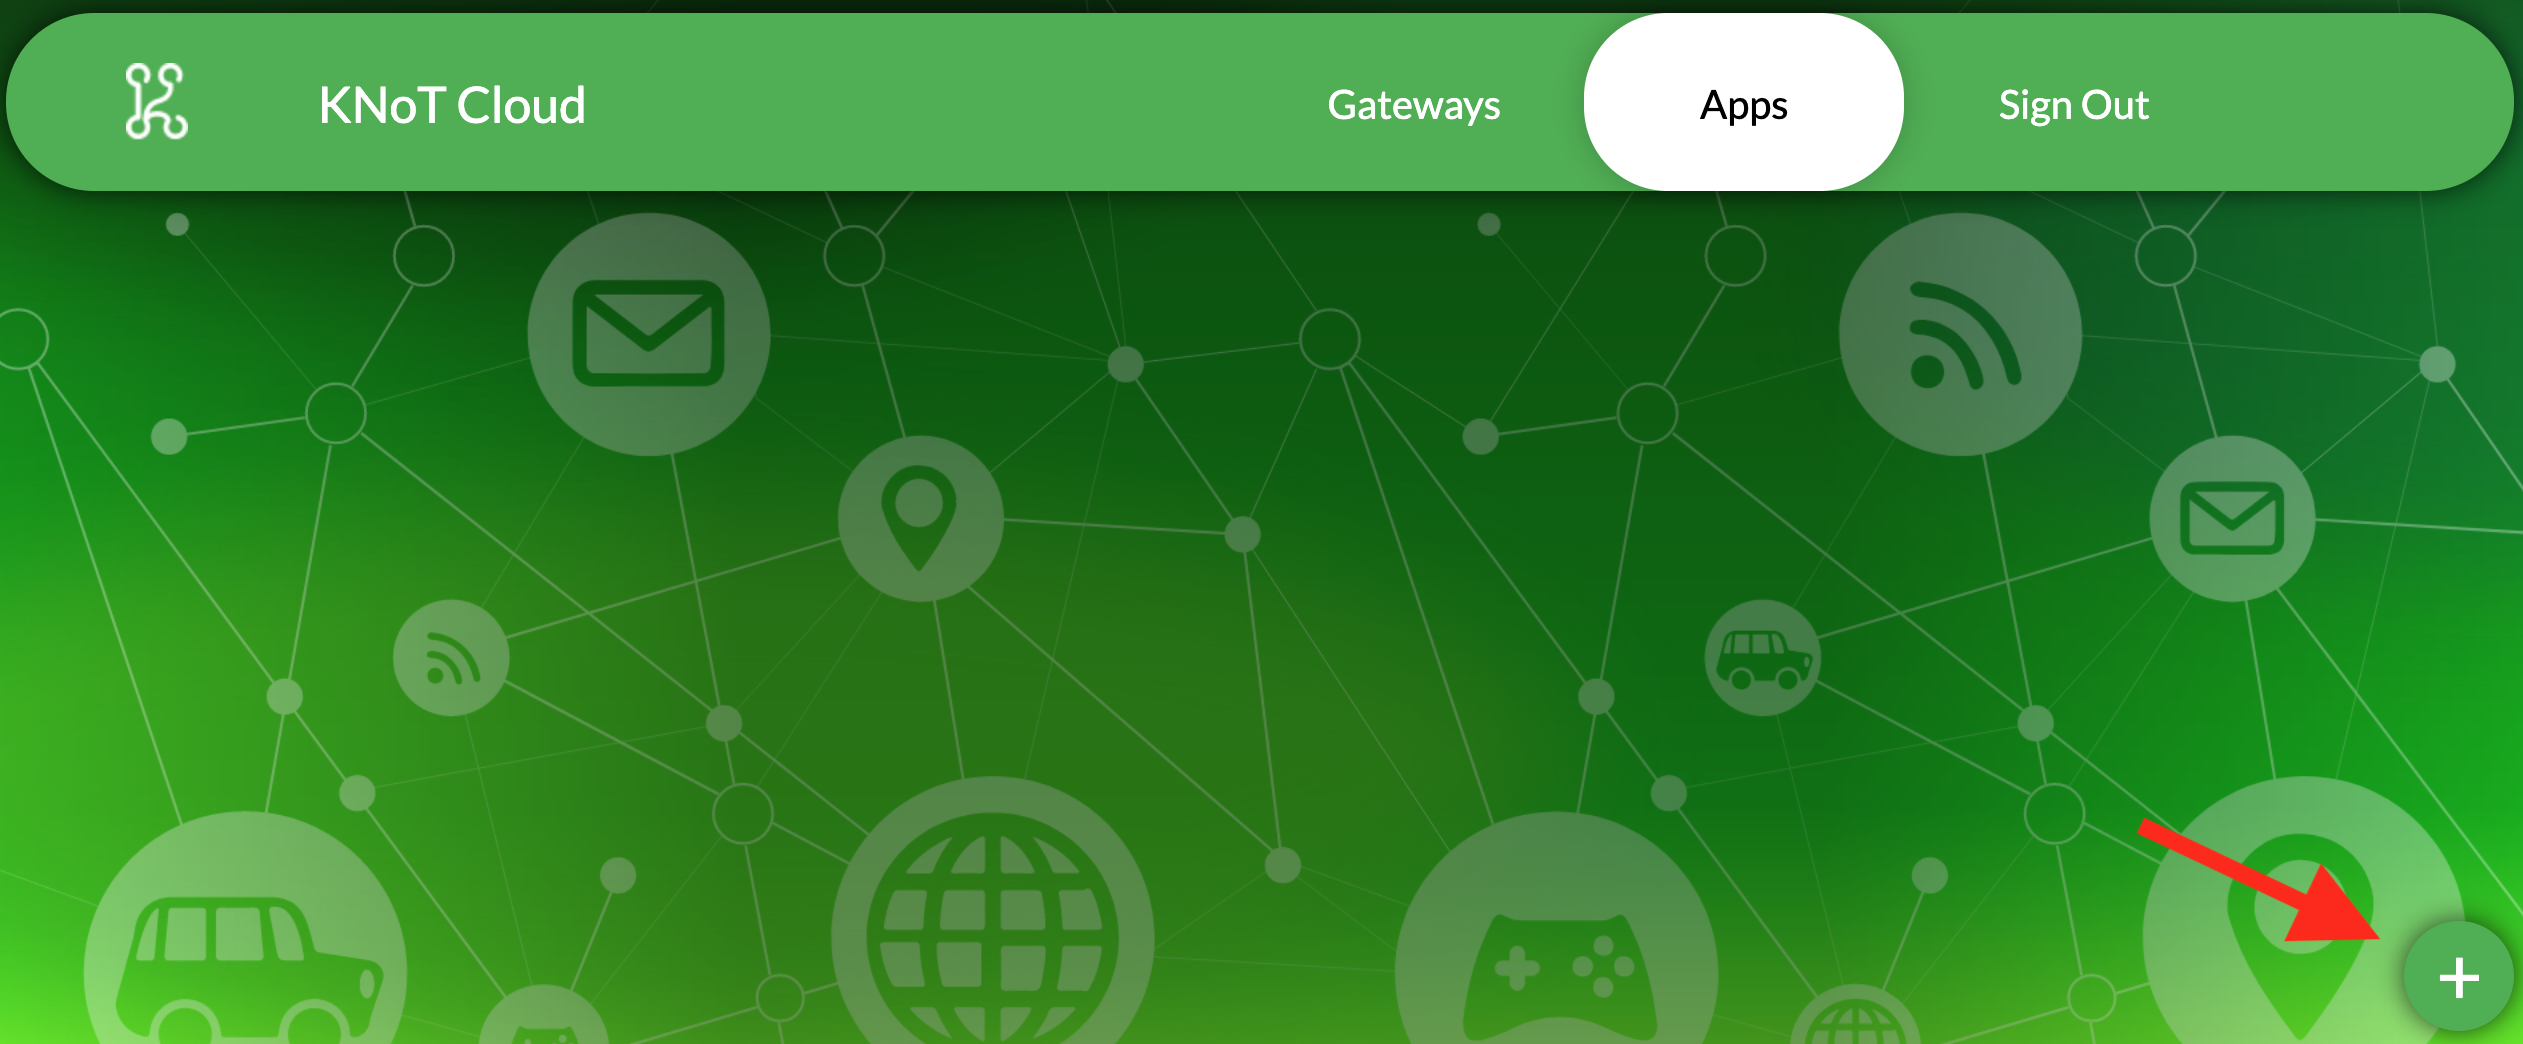
Set a name to your application.
Download the application credentials.
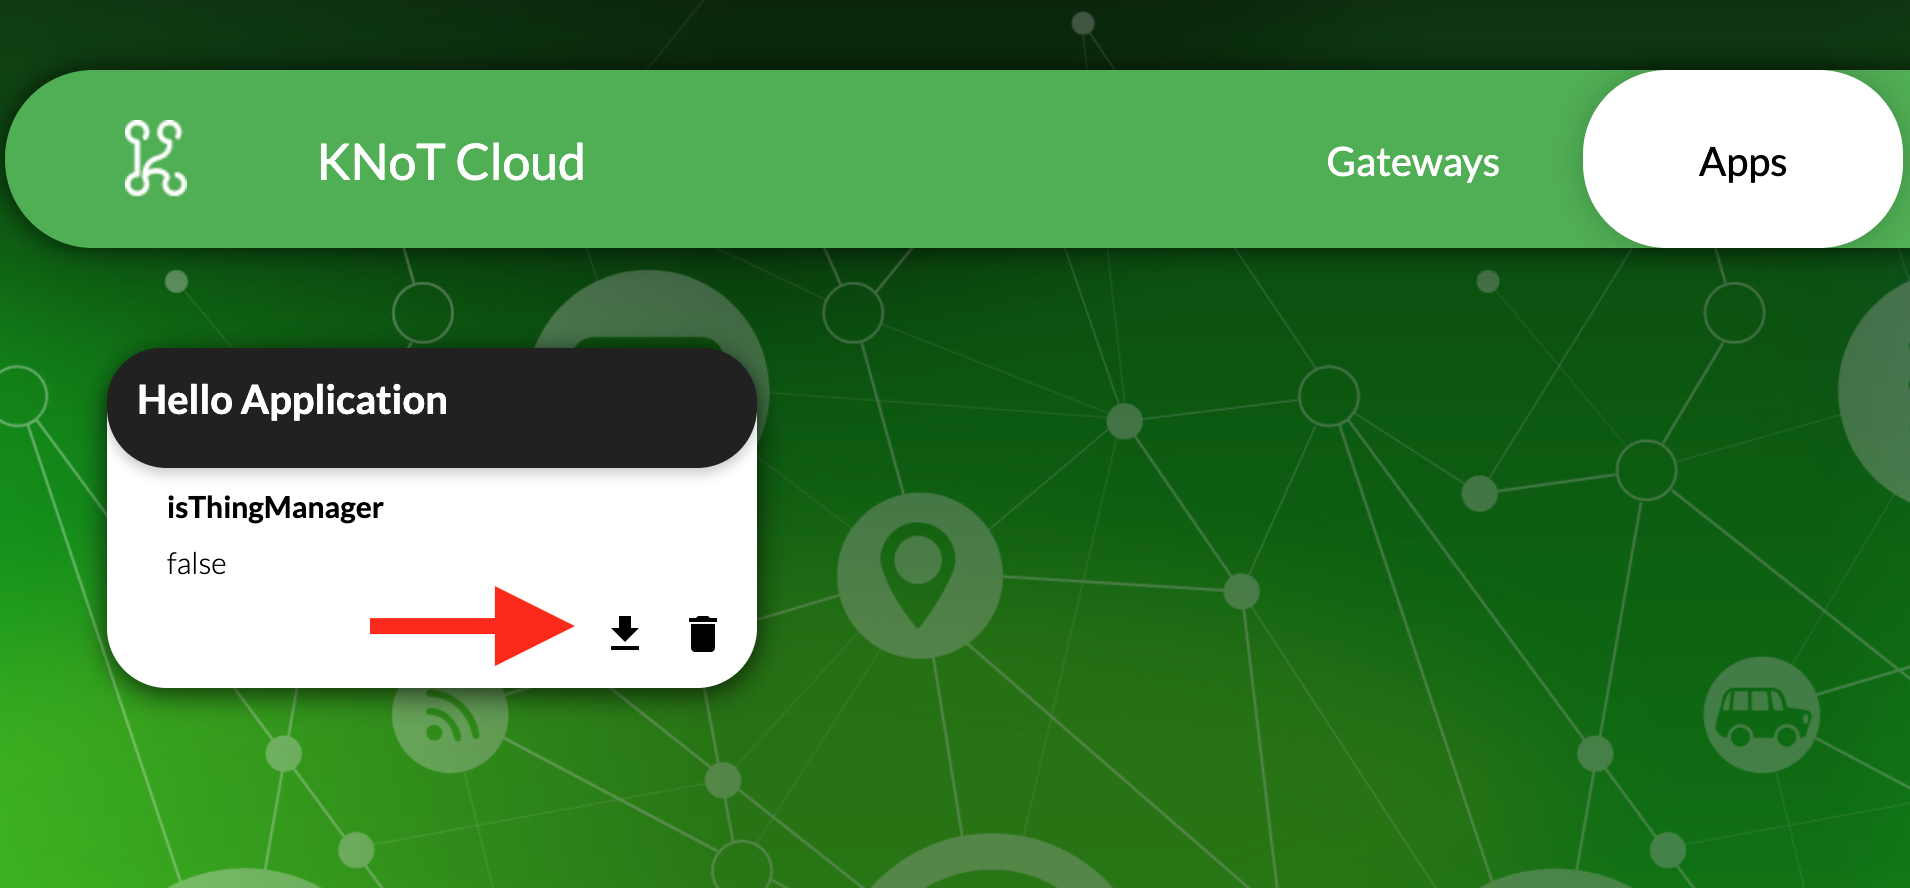
The application credentials should look like:
{
  "type": "knot:app",
  "metadata": {
    "name": "Hello Application"
  },
  "knot": {
    "id": "3c92790f-f265-46c9-bbf8-e440f0447587",
    "isThingManager": false
  },
  "token": "826faa7d545e39c8b2a198c74d0da54f95dfea55"
}
Interacting with an Application through KNoT Cloud SDK
Download and install NodeJS and NPM.
Create a new directory and start a NodeJS application on it.
mkdir my_knot_app
cd my_knot_app
npm init -y
Install the KNoT Cloud SDK for JavaScript.
npm i -s @cesarbr/knot-cloud-sdk-js
Create an
index.jsfile and import theknot-cloud-sdk-jslibrary.const { Client } = require('@cesarbr/knot-cloud-sdk-js');
Create a client connection instance with the KNoT Cloud WebSocket server.
const client = new Client({
  hostname: 'ws.knot.cloud',
  protocol: 'wss',
  port: 443,
  pathname: '/ws',
  id: '3c92790f-f265-46c9-bbf8-e440f0447587', // APP ID
  token: '826faa7d545e39c8b2a198c74d0da54f95dfea55', // APP TOKEN
});
Warning
Update the
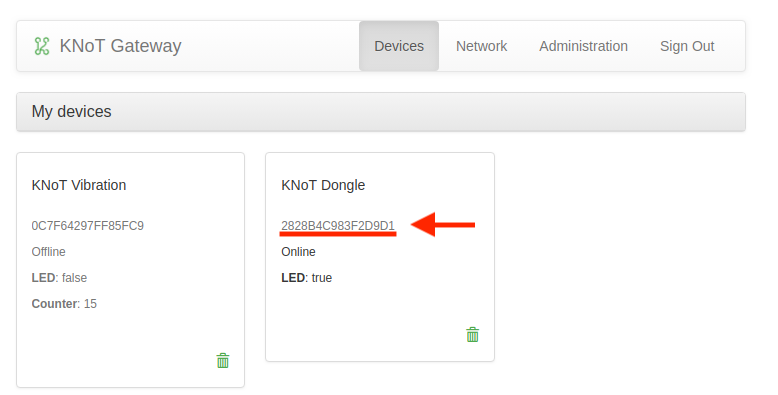
idandtokenfields with the application credentials that you have received.Get the KNoT Thing’s ID from the gateway interface.
Send
setDatacommand to turn off the KNoT Thing’s LED when the connection is established.const data = [ { sensorId: 0, // LED's sensorID value: false, // New LED's value }, ]; client.on('ready', () => { client.setData('2828b4c983f2d9d1', data); // Send setData command, passing to it the KNoT Thing's ID and the data. }); client.on('sent', () => { client.close(); // close the connection after command is sent }); client.on('error', (err) => { console.log(err); console.log('Connection refused'); }); client.connect();
Note
Use the KNoT Thing’s ID in lowercase like:
2828b4c983f2d9d1.Listen to data events sent by the KNoT Thing. These events can be listened to by registering a handler with
on('data').client.on('ready', () => {}); client.on('data', (data) => { if (data.from === '2828b4c983f2d9d1') { console.log(JSON.stringify(data, null, 2)); } }) client.on('error', (err) => { console.log(err); console.log('Connection refused'); }); client.connect();
Note
This event listener will receive every data events sent by all things associated with your user. To filter them, you just need to compare the
fromfield with the KNoT Thing ID you want to listen.The expected incoming data should look like:
{
  "from": "2828b4c983f2d9d1",
  "payload": {
    "sensorId": 0,
    "value": false,
  }
}
Run the example.
NODE_TLS_REJECT_UNAUTHORIZED=0 node index.js
Note
The environment variable NODE_TLS_REJECT_UNAUTHORIZED need to be set to ‘0’ in order to disable the TLS certificate verification, since you are connecting to a WebSocket Secure server. It should be used only on development.